
Do This Now
- 1 Saturation on an 808 is not a flavour. It is what makes the note audible on a phone.
- 2 Trim the output after every drive change or you are judging loudness, not tone.
- 3 Drive the low band only. Saturating a full drum bus destroys the hi-hats first.
- 4 Put saturation after your cuts and before your boosts.
- 5 Parallel saturation keeps the transients and adds the harmonics.
Saturation is treated as a finishing touch, a bit of warmth added at the end because someone said analogue gear sounds nice. That framing misses what it actually does, and it is the reason so many home-made beats have low end that measures fine and cannot be heard on the devices people actually use.
Saturation adds harmonics. A note at 50Hz gains energy at 100Hz, 150Hz, and upward, and those harmonics are what a phone speaker plays when it cannot reproduce the fundamental. The ear fills in the missing bottom from the pattern above it, which is why a commercial trap record still knocks through a laptop.
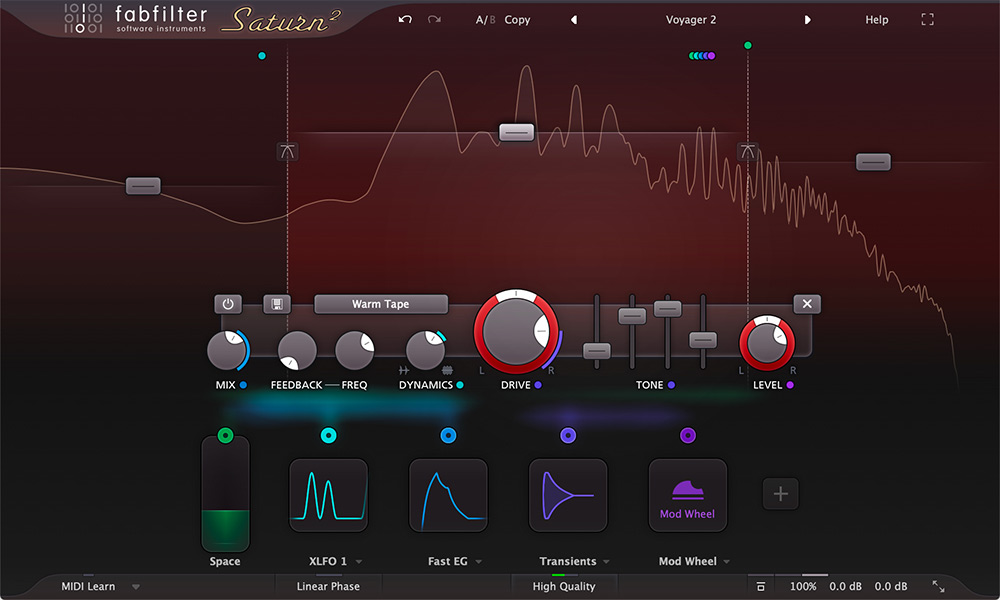
Step 1: Saturate the 808 First
If you only use saturation in one place, use it here.
Put a saturator on the 808 and play the beat through the worst speaker you own, then raise the drive slowly.
At zero the note will be nearly inaudible on a laptop, and somewhere around a third of the way up it becomes clearly pitched. That is your setting.
The friction is that this sounds worse on monitors than it does on a phone. Trust the small speaker, because a beat that only works on studio monitors has failed at its actual job.
- Check on
- Laptop or phone
- Drive until
- The note has identifiable pitch
- Type
- Tube or tape for weight, transistor for bite
- Then
- Trim output to match bypass
Step 2: Always Match the Level
This is a discipline rather than a technique, and skipping it is how producers convince themselves that saturation improved something.
Saturation raises perceived loudness because it adds energy. Any louder version wins an A and B comparison regardless of whether it is better. Use the output trim to match the saturated signal to the bypassed one, then switch between them and decide again.
You will reverse about a third of your decisions the first time you do this properly.
Step 3: Split the Bands on a Drum Bus
Driving a whole drum bus at once fails predictably, and it fails at the top first.
The kick wants a lot of drive to gain weight, and the hi-hats turn into a harsh mess long before the kick gets there. A multiband saturator lets you push the low band hard, leave the mids alone, and add only a touch to the top so cymbals gain air rather than grit.
- Low band
- Heavy drive for weight
- Mid band
- Light or none
- High band
- Very light, for air
- Crossovers
- Around 200Hz and 4kHz
The annoyance is that band splitting introduces phase shift at the crossover points, which can soften a kick transient. If the kick loses snap, widen the crossover or use parallel processing instead.
Step 4: Use Parallel Saturation on Transients
When you want harmonics without losing the attack, blend rather than replace.
Send the drums to a parallel channel, saturate that channel heavily, and mix it underneath the dry signal. The dry channel keeps the sharp transients intact while the parallel channel supplies the harmonic weight, which gives a result that a single insert cannot.
This works particularly well on snares, where heavy saturation adds body and destroys the crack if applied directly.
Step 5: Warm Samples Without Adding Noise
Sampled material benefits from saturation for a different reason: it makes new recordings sound like they passed through something physical.
Tape emulation is the usual choice here, because it softens transients and rolls off the extreme top in a way that reads as age rather than as filtering. On a clean piano loop a small amount of tape drive removes the digital edge without any obvious effect.
The friction is cumulative noise. Tape plugins often add a noise floor, and stacking three of them across different channels builds up hiss that becomes obvious in quiet sections.

Step 6: Know What Saturation Cannot Fix
Saturation adds harmonics to what exists and cannot create content that was never there.
A thin sample stays thin, a badly played part stays badly played, and a muddy arrangement gets muddier because saturation amplifies the low mids that were already crowded. If the beat is not working, saturation will make it a louder version of not working.
Cut the problem frequencies first, then drive what is left.
Used well, saturation is nearly invisible and does most of the work of making a beat sound finished. Used as a garnish it adds fuzz and takes away transients, which is the opposite of what a beat needs.
Frequently Asked Questions
What does saturation actually do to a sound?
It adds harmonic content at multiples of the frequencies already present. A 50Hz note gains energy at 100Hz, 150Hz, and above. That is why a saturated sub is audible on speakers that cannot reproduce 50Hz at all, because the ear reconstructs the missing fundamental from the harmonics.
Is saturation the same as distortion?
They are the same process at different intensities. Saturation keeps the source recognisable and adds harmonics gently, while distortion pushes until the harmonics dominate. Most plugins do both, and the drive control is simply how far along that scale you go.
Where should saturation go in my chain?
After subtractive EQ and before any boosts. Driving a resonance you have not removed makes that resonance worse, since saturation amplifies whatever is already there. On a bus, place it before the compressor if you want the compressor reacting to the harmonics.
How do I know if I have used too much saturation?
Match the output level to the bypassed signal and switch between them. If the saturated version sounds harsher rather than fuller, or if the transients have lost their snap, back the drive off. Level matching is essential because louder always sounds better in an unmatched comparison.
Related Articles
Best Lo-Fi Sample Packs for Chill Beat Makers (2026)
Dusty drums, vinyl crackle, and tape-warped melodies. We tested the top lo-fi sample packs for texture quality, inspiration rate, and real beat session usability.

Best Vinyl Crackle & Texture Sample Packs (2026)
We tested the top vinyl crackle and texture packs for noise character, loop-free authenticity, and how naturally the hiss and dust sit under a lo-fi beat.
Best Saturation Plugins for Beat Makers (2026)
We tested the top saturation and tape plugins for harmonic character, how they thicken 808s and drums, and whether they survive a phone speaker.

Jada Osei
Jada makes lo-fi beats, boom bap, and chill hop. She samples vinyl, builds beats on an SP-404 and in Ableton, and runs a YouTube beat-making channel with over 50K subscribers. She values vibe over perfection and believes the best sample packs sound like they were found, not manufactured.