
Do This Now
- 1 Use sends, not inserts, so you can filter the effect without touching the source.
- 2 High-pass every return around 300Hz. Low end in a tail is what causes mud.
- 3 Match decay and delay time to the tempo so tails clear before the next hit.
- 4 Delay before reverb. The reverse smears everything.
- 5 Duck the returns from the dry signal and you can use far more of both.
Delay and reverb are how a beat gets a sense of place, and they are also the fastest way to turn a clear arrangement into a fog. The problem is that both effects sound good in isolation and accumulate invisibly, so a producer adds a little to each channel and ends up with a mix where nothing has a defined edge.
The fix is mostly structural rather than a matter of taste. Where you put the effects, what you filter out of them, and how you time them to the tempo determine whether they add depth or subtract clarity.
Step 1: Use Sends, Not Inserts
Put one reverb and one delay on their own return channels and send to them from multiple tracks.
This has two benefits. Several elements sharing a reverb sound like they are in the same room, which is what makes a mix cohere, and a return channel can be processed independently so you can carve the effect without touching the dry signal.
The friction is that some effects genuinely belong as inserts. A heavily modulated delay that is part of a synth patch, or a reverb used as sound design rather than space, should stay on the channel.
Step 2: Filter Both Returns
This is the step that prevents almost every mud problem.
Put an EQ on each return. High-pass at around 300Hz so no low-frequency energy enters the tail, and low-pass the reverb somewhere between 5kHz and 8kHz so it sits behind the dry signal rather than adding brightness on top.
- Return high-pass
- 300Hz
- Reverb low-pass
- 5-8kHz
- Delay low-pass
- 6kHz
- Result
- Space without frequency buildup
The annoyance is that a filtered reverb sounds thin when you solo the return. That is correct, because you are hearing only the part that will not conflict with anything.
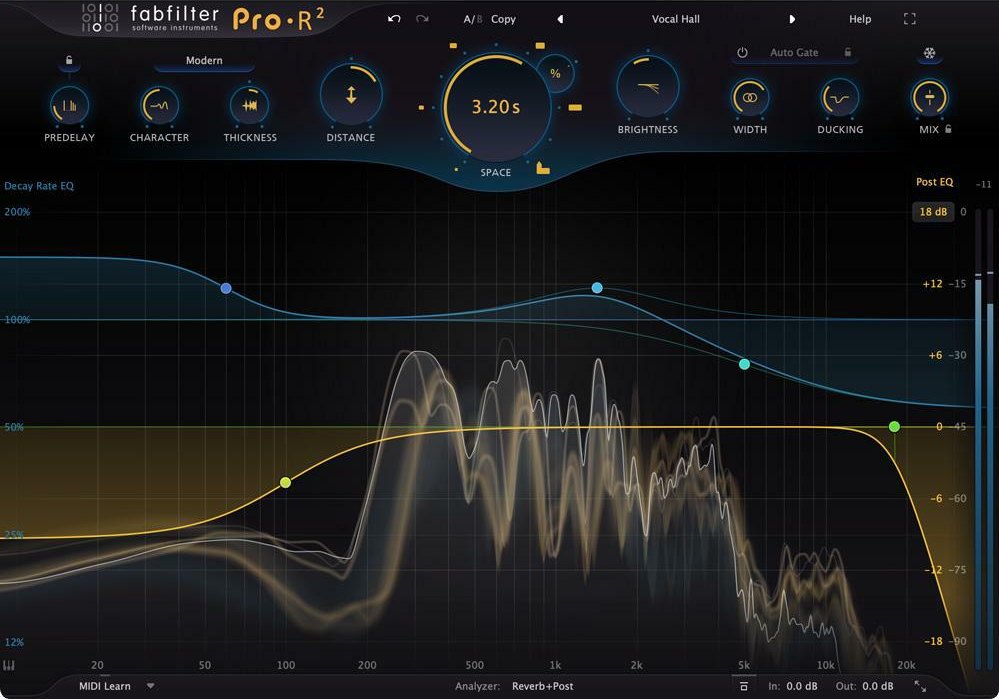
Step 3: Time Everything to the Tempo
An untimed effect fights the rhythm instead of supporting it.
Set delay times to musical divisions. A dotted eighth gives melodic width because the repeats fall between the main hits, a quarter note suits vocal throws, and a short slap around eighty milliseconds adds width to a snare without being heard as a separate repeat.
Reverb decay follows the same logic. Set the tail so it has faded before the next major hit, which usually means somewhere between one and two seconds at typical beat tempos.
- Melodic width
- Dotted eighth
- Vocal throws
- Quarter note
- Snare width
- 80ms slap
- Reverb decay
- Tail clears before the next hit
Step 4: Set Pre-Delay to Keep the Source Clear
Pre-delay is the most useful reverb control and the one people leave at default.
A gap of twenty to forty milliseconds between the dry sound and the tail keeps the source distinct, so a vocal stays intelligible while still sitting in a space. With zero pre-delay the reverb starts at the same moment as the word and blurs the consonants immediately.
Longer pre-delay pushes the space further back and makes the source feel closer, which is usually what a lead element wants.

Step 5: Delay Into Reverb, Not the Reverse
Order matters and there is a default that works.
Send the delay return into the reverb so the repeats sit in the same space as the source, which sounds natural and coherent. Reverb into delay produces a smeared, washed result where the tail itself is being repeated, and while that is occasionally useful creatively it is rarely what a beat wants.
The friction is that routing a return into another return causes feedback loops in some DAWs. Check that your delay return is not also sending back to itself before you add the reverb.
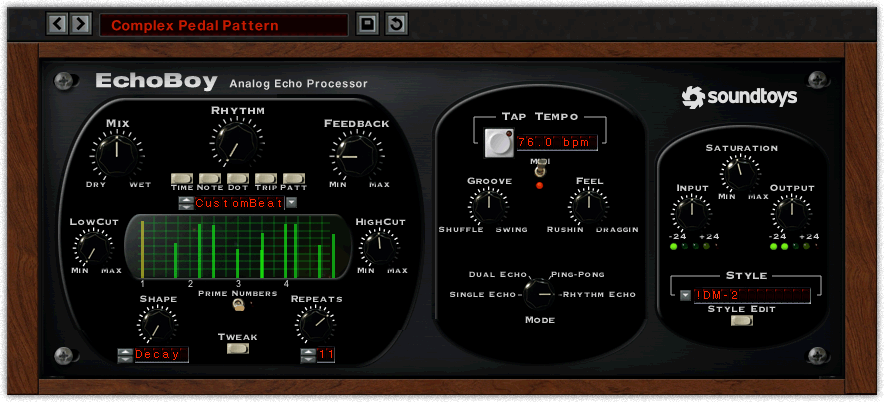
Step 6: Duck the Returns From the Dry Signal
This is the technique that lets you use far more space without losing clarity.
Put a compressor on each return and sidechain it from the dry source. The tail now reduces while the source is playing and swells in the gaps between phrases, which means the reverb is loud enough to hear as an atmosphere and never competes with the words or the melody.
Set a fast attack and a release of around two hundred milliseconds so the tail comes back quickly once the source stops.
Step 7: Bypass Everything and Compare
Before you finish, mute both return channels and listen to the whole beat dry.
If the dry version sounds clearer and tighter in a way you prefer, you have used too much. If it sounds flat and small, the effects are doing their job. Making this comparison at the end of a session, rather than while you are setting each effect, is the only reliable way to judge the total.
Space is something you add sparingly and filter aggressively. A beat with one well-timed delay and one filtered reverb will almost always sound bigger than one with five effects competing for the same air.
Frequently Asked Questions
Should I use reverb as a send or an insert?
A send, almost always. A send lets several tracks share one reverb, which places them in the same space, and it lets you EQ the reverb return without affecting the dry signal. Inserts make sense only when the effect is part of the sound itself rather than the space around it.
What is pre-delay and why does it matter?
Pre-delay is the gap between the dry sound and the start of the reverb tail. Twenty to forty milliseconds keeps the source distinct and audible while still placing it in a space. Zero pre-delay makes a vocal sound like it is inside the reverb rather than in front of it.
How much reverb should a beat have?
Less than feels right while you are setting it. Reverb is easy to over-apply because it sounds pleasant in solo and accumulates across a mix. A good test is bypassing all returns at once: if the mix sounds noticeably tighter and clearer, you were using too much.
Why does my beat sound muddy when I add reverb?
Because the tail carries low frequencies that stack up with everything else in the low mids. High-passing the reverb return at around 300Hz removes that entirely while keeping the sense of space, and it is the single most effective fix for a washed-out mix.
Related Articles
Best Delay Plugins for Producers (2026)
We tested the top delay plugins for tape character, repeat clarity, tempo sync behaviour, and how well they add space without cluttering a beat.
Best Reverb Plugins for Producers (2026)
We tested the top reverb plugins for tail character, CPU load, and how naturally they add space to drums, vocals, and melodies in a modern beat.

Best Vocal Sample Packs for Beat Makers (2026)
We tested the top vocal sample packs for pitch accuracy, noise floor, and how cleanly the acapellas and chops sit in a hip-hop, trap, or R&B beat.

Louis Raveton
Louis makes Downtempo, Electro-Dub, and beat-driven music under the names Flagada and Monsieur Shwill. He treats his sample drive like a record collection and has been obsessively hunting textures, breaks, and weird synth patches for over a decade. He also composes for Canal+ animation and LVMH installations, which means he has tested tools under real deadline pressure.